Preserving with Spices and Herbs

spices 2.jpg

Adding spices and herbs to your preserves can completely transform the contents inside your jar. A touch of rosemary to rhubarb jam makes a completely different flavoured jam than the addition of vanilla. This is where exploring new recipes and getting creative in the kitchen can be a lot of fun. Pickles made with the exact same brine and same vegetables except with altered spices or herbs end up tasting extremely different.

Here are a few of the recipes out there with interesting herb/spice combinations that I have put on my list to try in 2014. What's your favourite preserving recipe that uses interesting spices?

Apricot Currant Grand Marnier and White Pepper Jam

Peach Lavender Jam

Rosemary Rhubarb Jam

Spicy Quince and Apple Chutney

spices_thyme2.jpg
spices_lavender.jpg
spices 3.jpg

Blood Orange Curd - Pressure Canned

bloodorangecurd.jpg

The last Monday of each month, I teach a preserving class at The Depanneur. During the summer months, the classes fill up quickly as people are excited about getting all of the wonderful local, in season produce into jars. In the winter when the winter blah's have set in, the world is white and local produce lacks the excitement of the bursting, juicy raspberries of summer - it is a little more difficult to get people excited about the idea of preserving.

This month we decided that it was time to teach a Pressure Canning 101 class and to 'sexify' it up we chose Blood Orange Curd. Today, I gave the adapted recipe a test run just in time for tomorrow's class and also because the blood oranges looked too delicious to just sit there for the next 24 hours.

bloodorangecurd_ingred.jpg

Blood Orange Curd (adapted from a recipe by Linda Amendt)

Ingredients

·       1 2/3 cups superfine sugar

·       1/3 cup fresh blood orange zest

·       4 large eggs

·       8 large egg yolks

·       1 cup strained fresh blood orange juice (5-6 orange

·       2/3 cup unsalted butter, chilled and cut into approx. 10 pieces

Preparation:

Place a medium glass or metal bowl in the fridge to chill.

In a small bowl, combine the superfine sugar and orange zest, stirring until well blended. Let stand for 30 minutes to allow the sugar to pick up the citrus flavor of the zest.

Fill the bottom pan of a double boiler or medium saucepan about ¼ full of water. Over med-high heat bring the water to a gentle boil.

In the top pan of a double boiler or a medium metal bowl, lightly beat the whole eggs and egg yolks. Gradually whisking in the sugar and the zest until well blended. Stir in the blood orange juice. Add the butter.

Place the pan or bowl over the pan of boiling water. Make sure the top pan sits well above the water so the curd will be cooked by the steam only, not the boiling water. Reduce the heat to keep the water from boiling too vigorously.

Slowly heat the mixture, stirring constantly with a flexible spoon or spatula. Stir gently or the curd will be filled with tiny air bubbles. Scrape the bottom of the pan frequently to prevent scorching or curdling. Cook the mixture until it reaches a temperature between 168F and 170F (76C and 77C) about 5-7 minutes.

Remove the top pan or bowl from the double boiler and place it on a dish towel. Continue to stir the mixture until the curd thickens and coats the back of a metal spoon, about 5 minutes.

Remove the chilled bowl from the fridge. Place a fine meshed sieve over the bowl. Slowly pour the curd through the sieve and into the chilled bowl to strain the zest and any small lumps from the curd. Gently stir the curd to remove any trapped air bubbles.

Ladle the curd into hot jars, leaving 1/4” head space. Using a plastic knife, remove any trapped air bubbles. Wipe the jar rims and threads with a clean, damp cloth. Cover with hot lids and apply screw rings. Process 125 and 250ml jars for 10 minutes at 10 pounds of pressure in a weighted gauge pressure canner or 10 minutes at 11 pounds pressure in a dial gauge pressure canner.

Yields 3-250ml jars


Award Winning Raspberry Jelly

frozenrasperry.jpg

I have always loved picking raspberries. Growing up, we would spend weeks at my Nona's house in Sparwood, BC and at my nona's house there was a garden filled with fresh vegetables and several rows of juicy and delicious raspberries. I would sit and wait for those raspberries to become ripe and then while the sun beat down on my shoulders I would walk up and down the rows searching out the plumpest and reddest raspberry to pick. I loved how they practically fell off the canes right into your hands. Their skin so tender and full that even the slightest amount of pressure at times could set their juices free.

And now, many years later, it just doesn't feel like summer if I don't get out amongst the raspberries with a bucket in hand. And each summer I freeze bag after bag of ripe raspberries so that in the depth of winter I always have summer close at hand.

My favourite raspberries jellies have always been made from frozen raspberries and my Champion Jelly at this past year's Royal Winter Fair was no different. You may be surprised when you read that frozen berries are suggested for use to make this jelly. But I have found that frozen berries (especially when you have picked them yourself from a trusted farm) give you a more intense raspberry flavour.

Ingredients

  • 4 - 600g bags of frozen rasberries
  • 7.5 cups sugar
  • 2 - 3 oz pouches liquid pectin

Directions

Defrost your berries overnight in a large bowl (do not rinse). Using a potato masher, crush the berries a couple of cups at a time to release the juice.
Over medium heat in a large stainless steel pan, bring the raspberries and their juice to a gentle simmer. Reduce the heat to low, cover the pot and continue to simmer for 5 minutes. Turn off the heat, remove the cover and gently skim off any foam. Cover once again and let the pot with the raspberries stand for at least 20 minutes.

Place a fine meshed sieve over a bowl and gently ladle the raspberries and their juice into the sieve. Don't rush this process. Let the juice fall through the sieve on it's own. Do not crush the raspberries in order to extract more juice or to extract the juice more quickly. This will lead to a cloudy jelly. Throw out the meat of the raspberries as well as the seeds. Rinse the sieve and ladle the juice once again into the sieve to catch any seeds that may have snuck through the first time.

Rinse the sieve thoroughly and line with 2 damp paper coffee filters and strain the juice once more. Again...be patient. For an extra clear jelly repeat this process once again.

Cover the juice and refrigerate over night.

Being careful to not stir up and of the sediment that may have settled on the bottom of your bowl, once again line a fine meshed sieve with a damp coffee filter and strain the juice once more. You will want 4 cups of raspberry juice in the end.

Warm your oven to 200 and place the sugar inside to warm.

In a large stainless steel pan over medium heat, heat the 4 cups raspberry juice just until it is warm. Add the warmed sugar and stir constantly until the sugar has completely dissolved. Increase to medium-high heat and while continuing to stir constantly bring to a full rolling boil (a boil that can not be stirred down). Empty the contents from both packets of pectin and stir fully. Stir constantly and once again return the mixture to a full rolling boil. Boil and stir for 1 minute.

Remove the pan from the heat and turn off element.

Skim off any foam and ladle into sterilized jars. Leave 1/4" headspace. Process at 200F for 10 minutes.

Yields approx: 8 - 250ml jars


The retirement of Miss Cackles

On Friday, I met with one of the students at George Brown who is working on a Digital Marketing Strategy for Manning Canning. See - Manning Canning has been chosen by the Marketing program there to be the recipient of customized Digital Marketing Strategy. How lucky am I?

We covered many different topics in our brief check in meeting, but the one that stuck with me and that I knew I needed to kick into action sooner rather than later was the inevitable retirement of my social media handle @misscackles.

I joined twitter well before Manning Canning was even a twinkle in these lovely brown eyes of mine and never even considered the switch when the business started.

But now that we are growing, it is time to @misscackles to retire gracefully and allow @manningcanning to take centre stage.

If you follow me and are wondering where I went...I am still out there. Just follow the laughter and you will find me.


February 2014: A Canadian Worth Watching

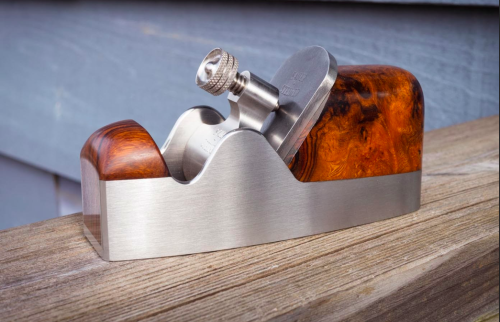
Photo credit: Sauer and Steiner Toolworks

In my previous life, before I became a full time preserver, pickler and jam maker I worked in Marketing. I started off my career in packaged goods, spent a while in traditional marketing and eventually ended up in digital marketing. In the span of years where I was working in traditional marketing I had the pleasure of working with Konrad Sauer. He was an art director at an agency where I was a Project Manager. Kon and I got along like a house on fire. Not only did we work well together but we enjoyed one another's company. He got my sarcastic sense of humour and I think I can go so far as to say he even appreciated it.

Kon took the leap and followed his dreams well before I even knew what my dreams were. See, not only was Konrad an extremely talented designer but Konrad had a talent for woodworking like few others and he had a passion for wood planes.

He had been doing woodworking for long enough to realize that there were not a lot of people out there making quality wood planes and he decided to start a business doing just that. Like me, Konrad didn't just quit his day job and launch into his new business overnight. He moonlighted for quite some time. Being an art director by day and a husband, father and wood plane builder by night. Eventually the time came where he knew it was time to transition and he hasn't looked back since.

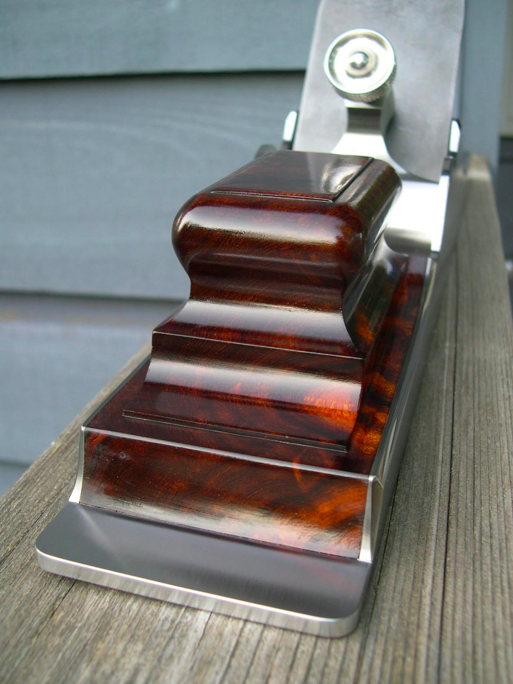
Photo credit: Sauer and Steiner Toolworks

I cheered Konrad and his decision to follow his dreams on from the sidelines, and occasionally sit down to read his blog and admire his work. I believe him to be one of the most talented people I know and I am thrilled for the success he has achieved. And I know that Konrad is sitting on the sideline cheering me on in my new venture. 

You should really take a few moments and get lost in his blog. His projects are amazing, his approach is fascinating and the work he does is astounding. He is a Canadian to keep an eye on.


This post is part of The Canadian Food Experience, it began June 7 2013. As we share our collective stories through our regional food experiences, we hope to bring global clarity to our Canadian culinary identity.

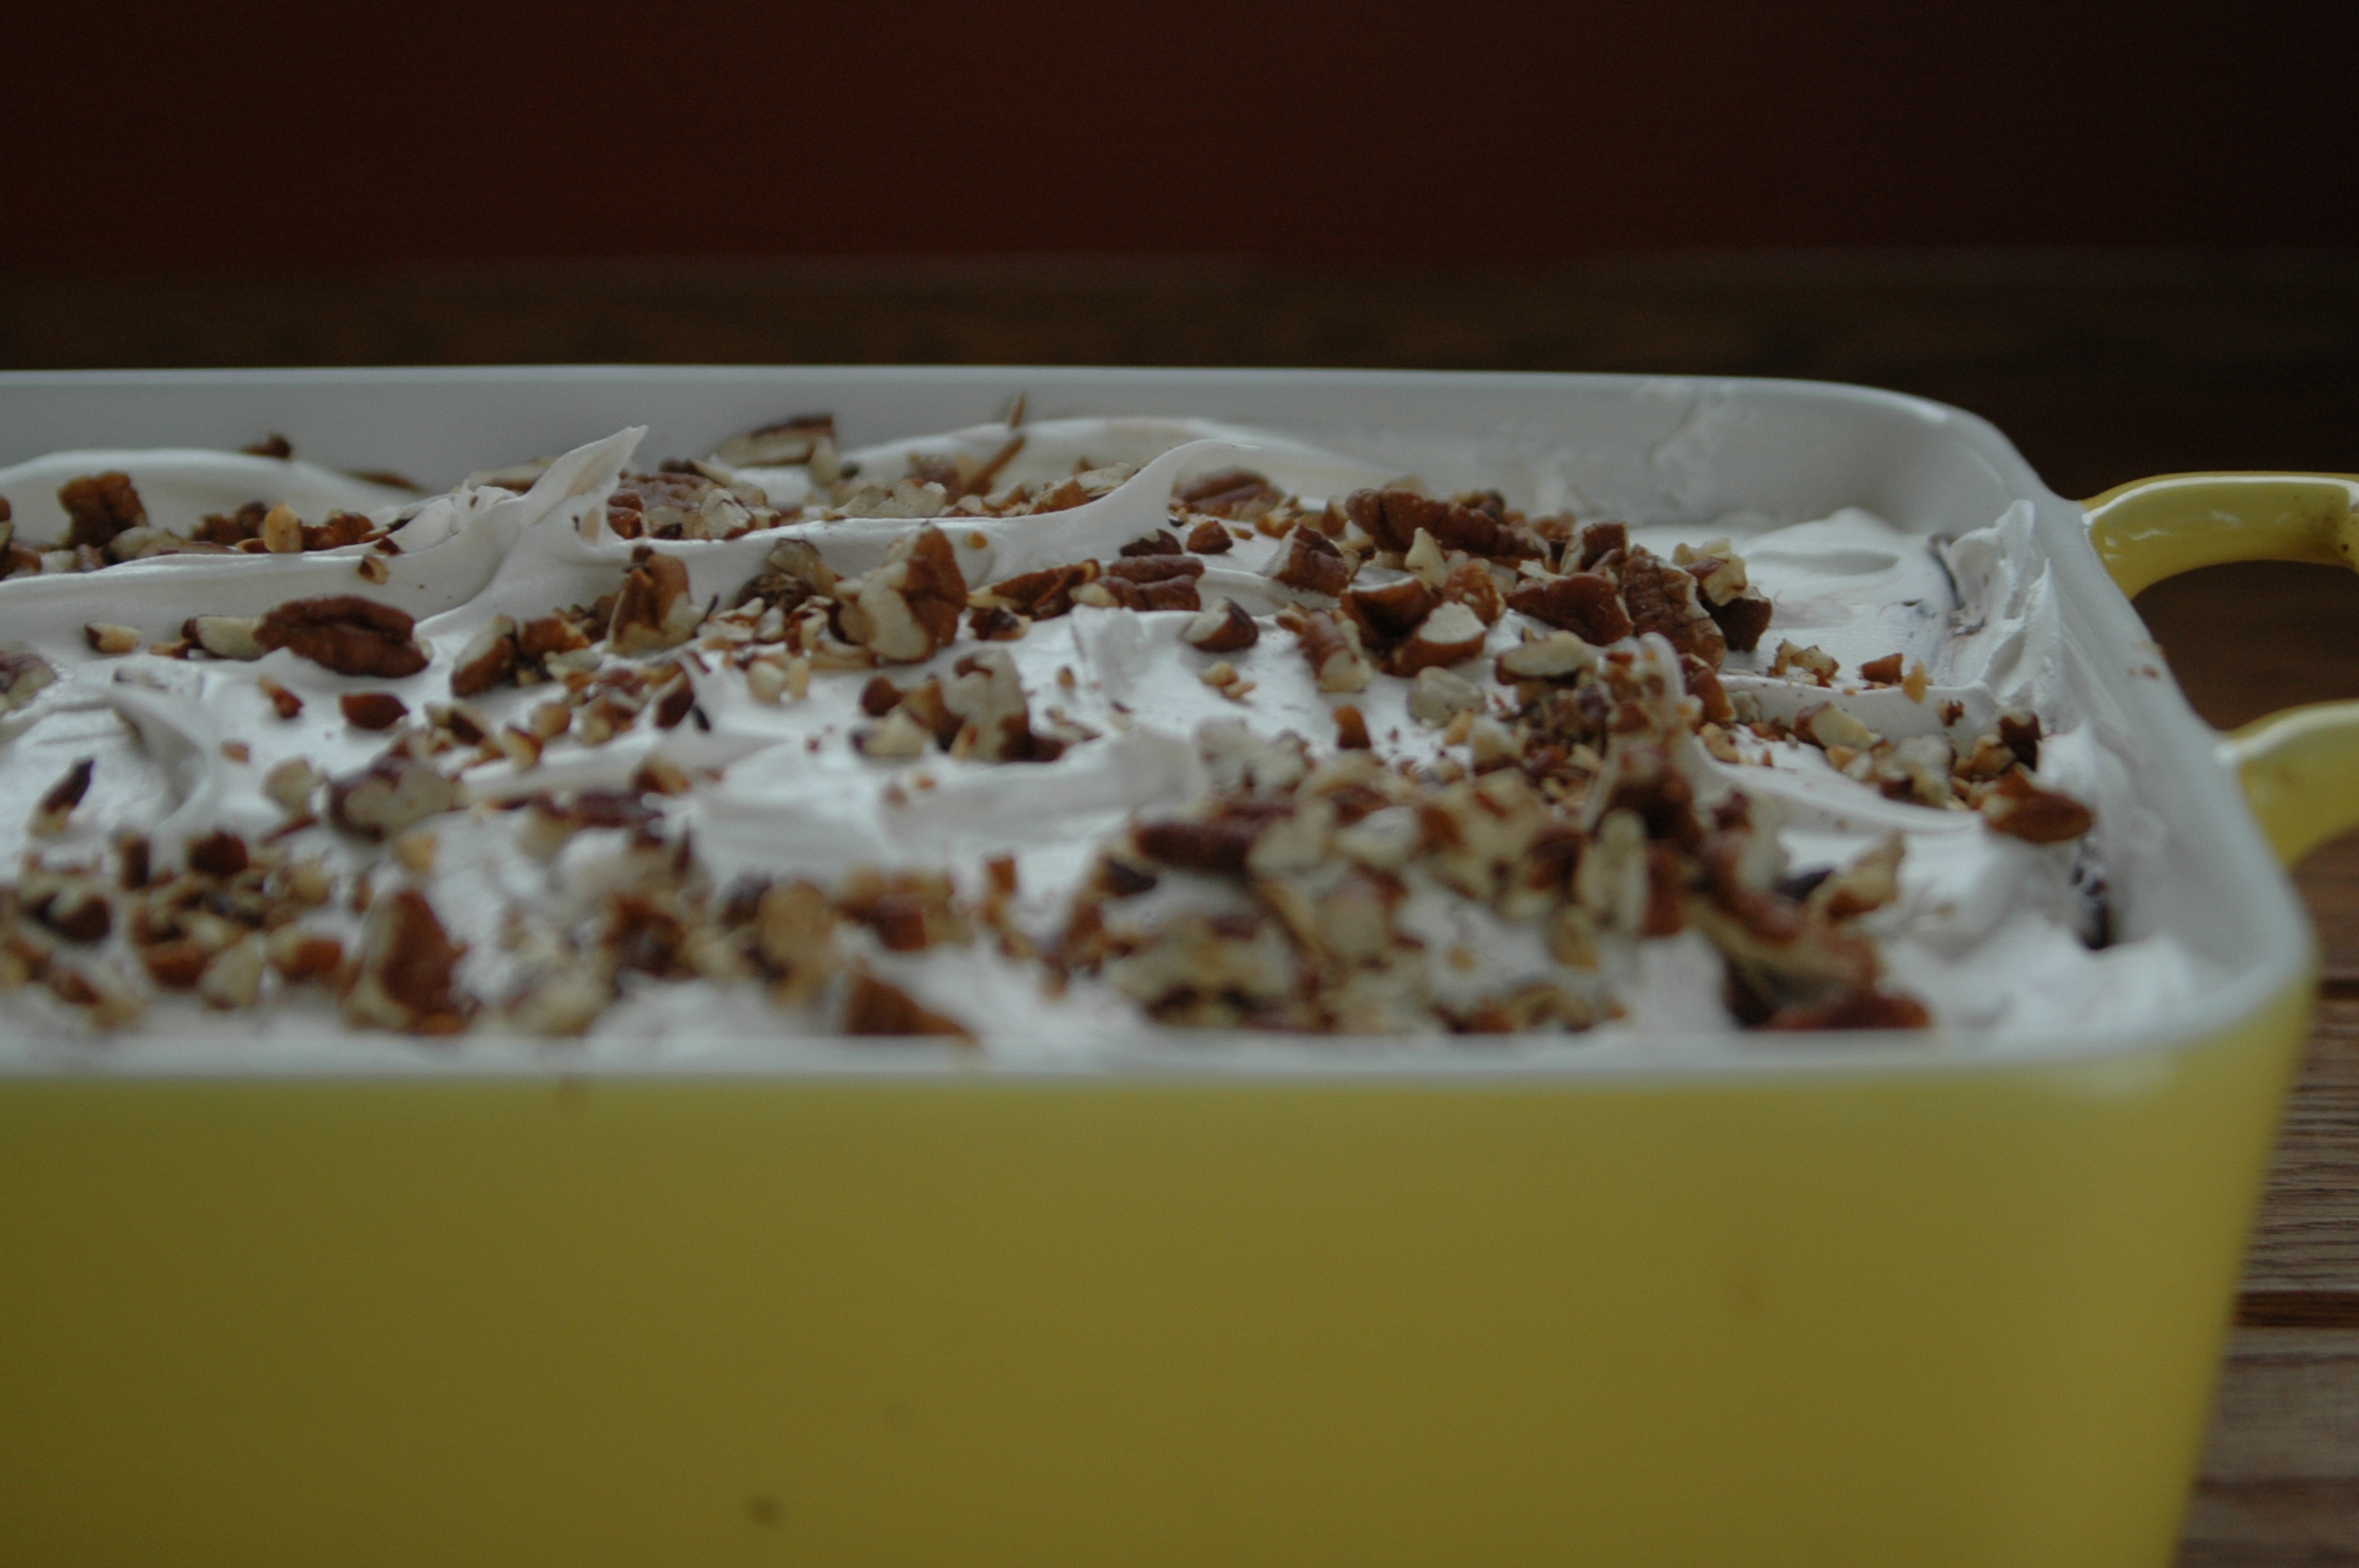
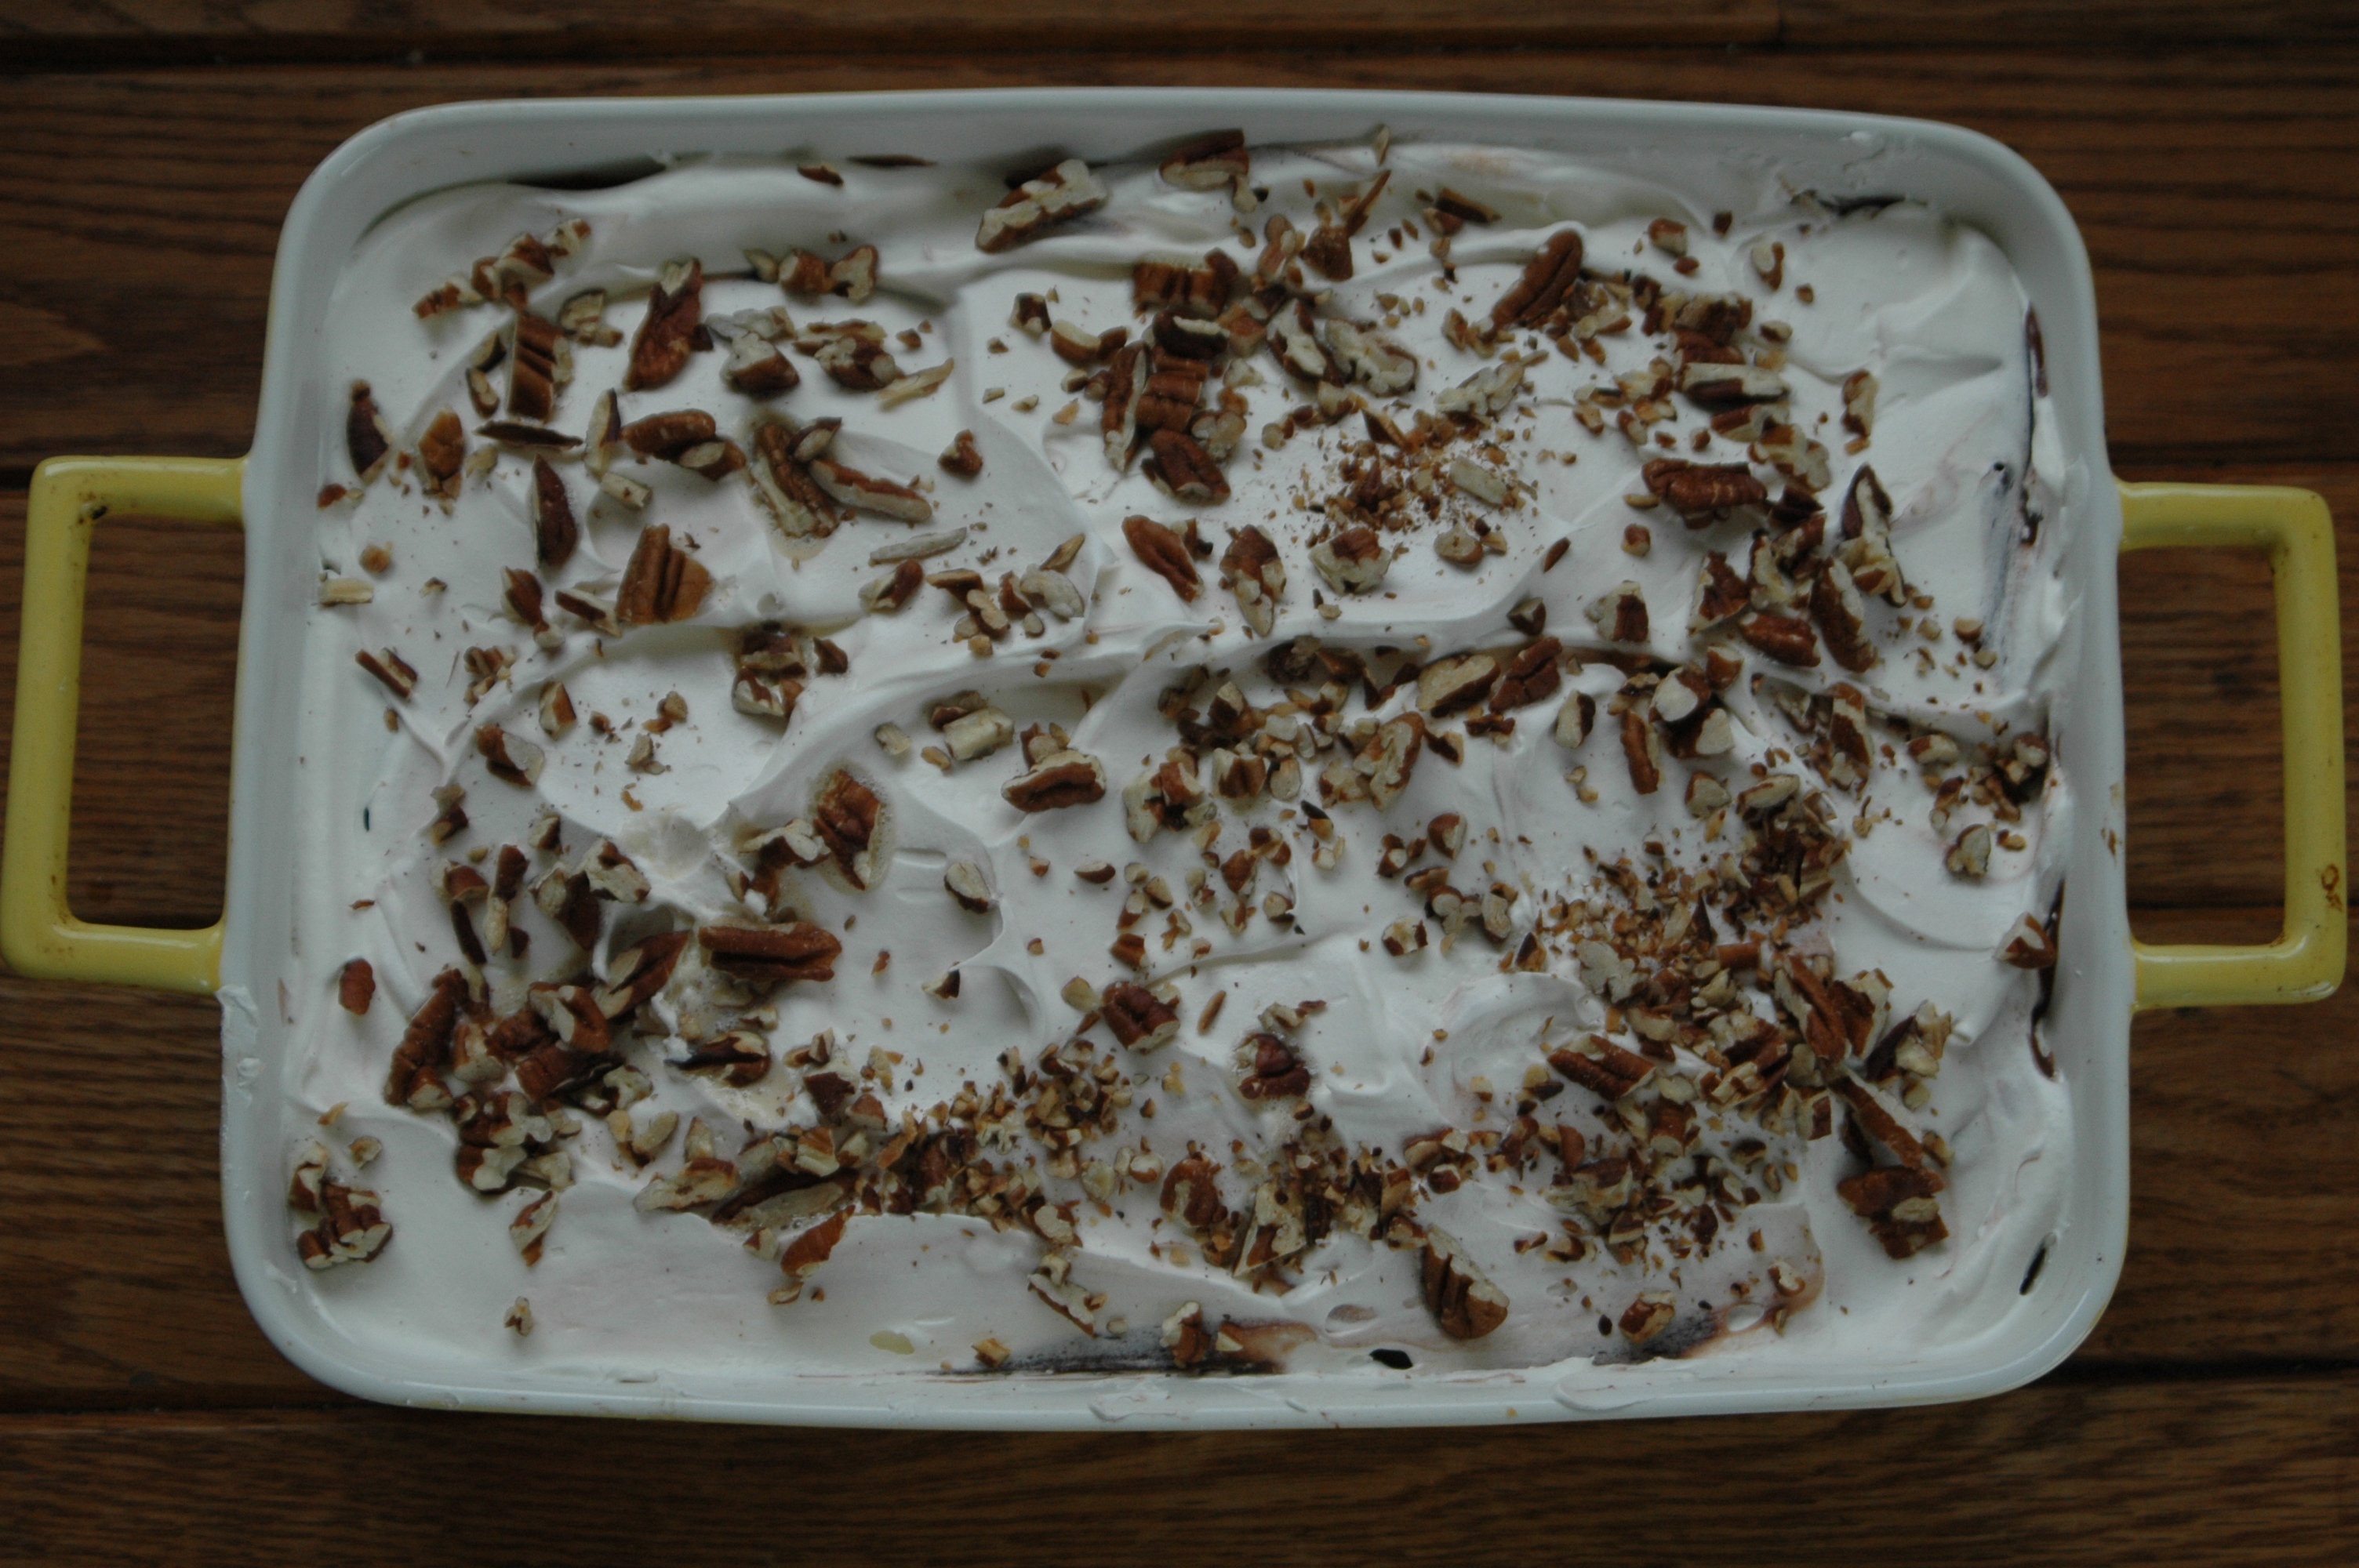
Easiest Dessert EVER - Sex in a Pan


Two quick points before I begin.

1) Yes it tastes as good as the name suggests,

2) It tastes that good because there is not one single healthy ingredient in this recipe, except perhaps for the pecans and maybe the milk. But in my case, not even really the milk because I used full on 2%.

Sure, if you wanted to you could make this dessert 'less bad' for you, but my thinking is - what is the point? You could use fat free pudding or low fat cream cheese, but seeing as I only make this dessert once every couple of years, when I make it I simply throw the kitchen sink at it. How bad could 1 slice of this (ahem...maybe 3 or 4 if I am being honest with you) actually be?

Over the past 2 weeks, I have basically been making marmalade every 2nd day. I have taken just over 200lb of Certified Organic Seville Oranges and made a LOT of marmalade. This also means that I have hand cut the skin of over 200lb of oranges. For the past few nights every time I turn my head, I get a shooting pain, which I am now calling Marmalade Neck.

It's now Superbowl Sunday (obviously) and a very good chef friend of mine (whom also happens to be a HUGE football fan) has invited herself over (actually I invited her over, but it sounds better this way) and is basically catering our Superbowl meal. The menu is outstanding and I offered to make dessert.

What does one make for dessert when they are exhausted, tired of being in the kitchen yet know they want something that tastes delicious and everyone is sure to enjoy? SEX.IN.A.PAN

Sex in a Pan (recipe given to me by my mother; Sheila Manning)

Ingredients
1 1/2 cups pecan, finely chopped
1 1/2 cups flour
3/4 cup margarine
8 oz cream cheese
1 cup icing sugar
Large tub cool whip
Instant chocolate pudding (1 package)
Instant vanilla pudding (1 package)
3 cups milk
1/4 cup pecans, toasted and finely chopped

Directions
Bottom layer:
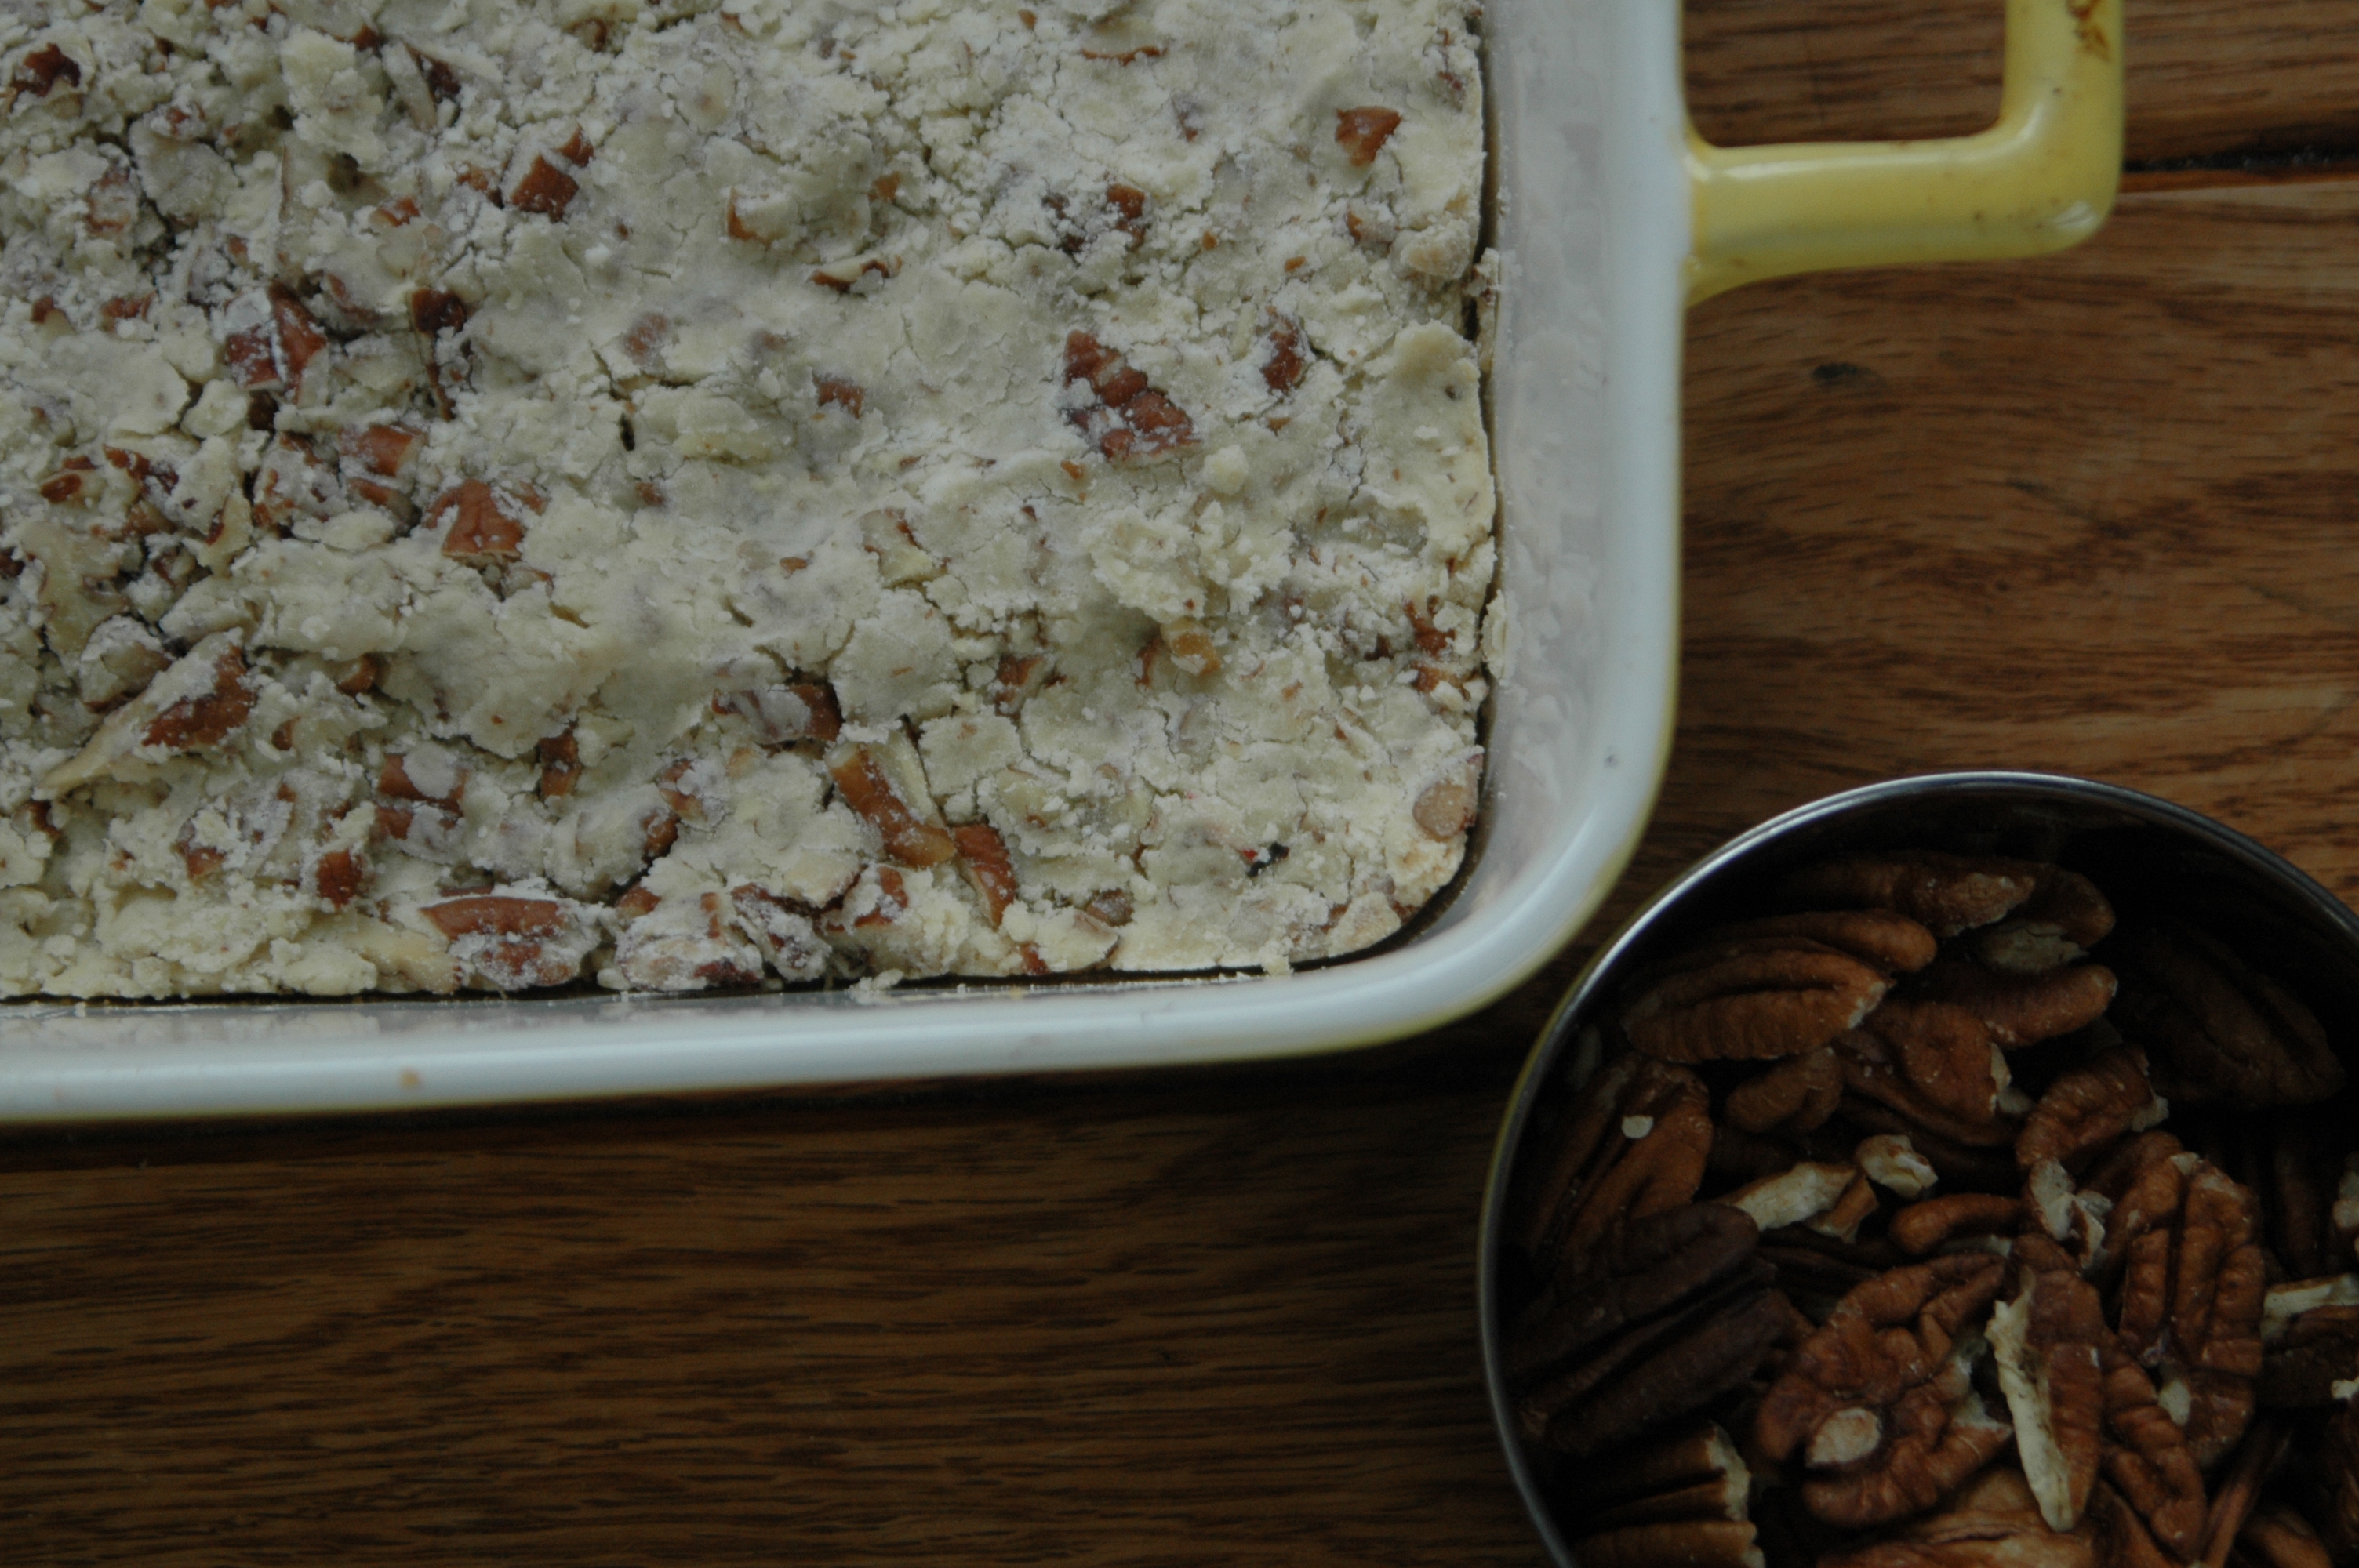
Combine 1 1/2 cups pecans, 1 1/2 cups flour and 3/4 cup margarine in a bowl and combine throughly. Press mixture into a 9 x 13 pan and bake at 350 degrees for 15-20 minutes until lightly browned. Remove from the oven and allow to cool.
Second layer:
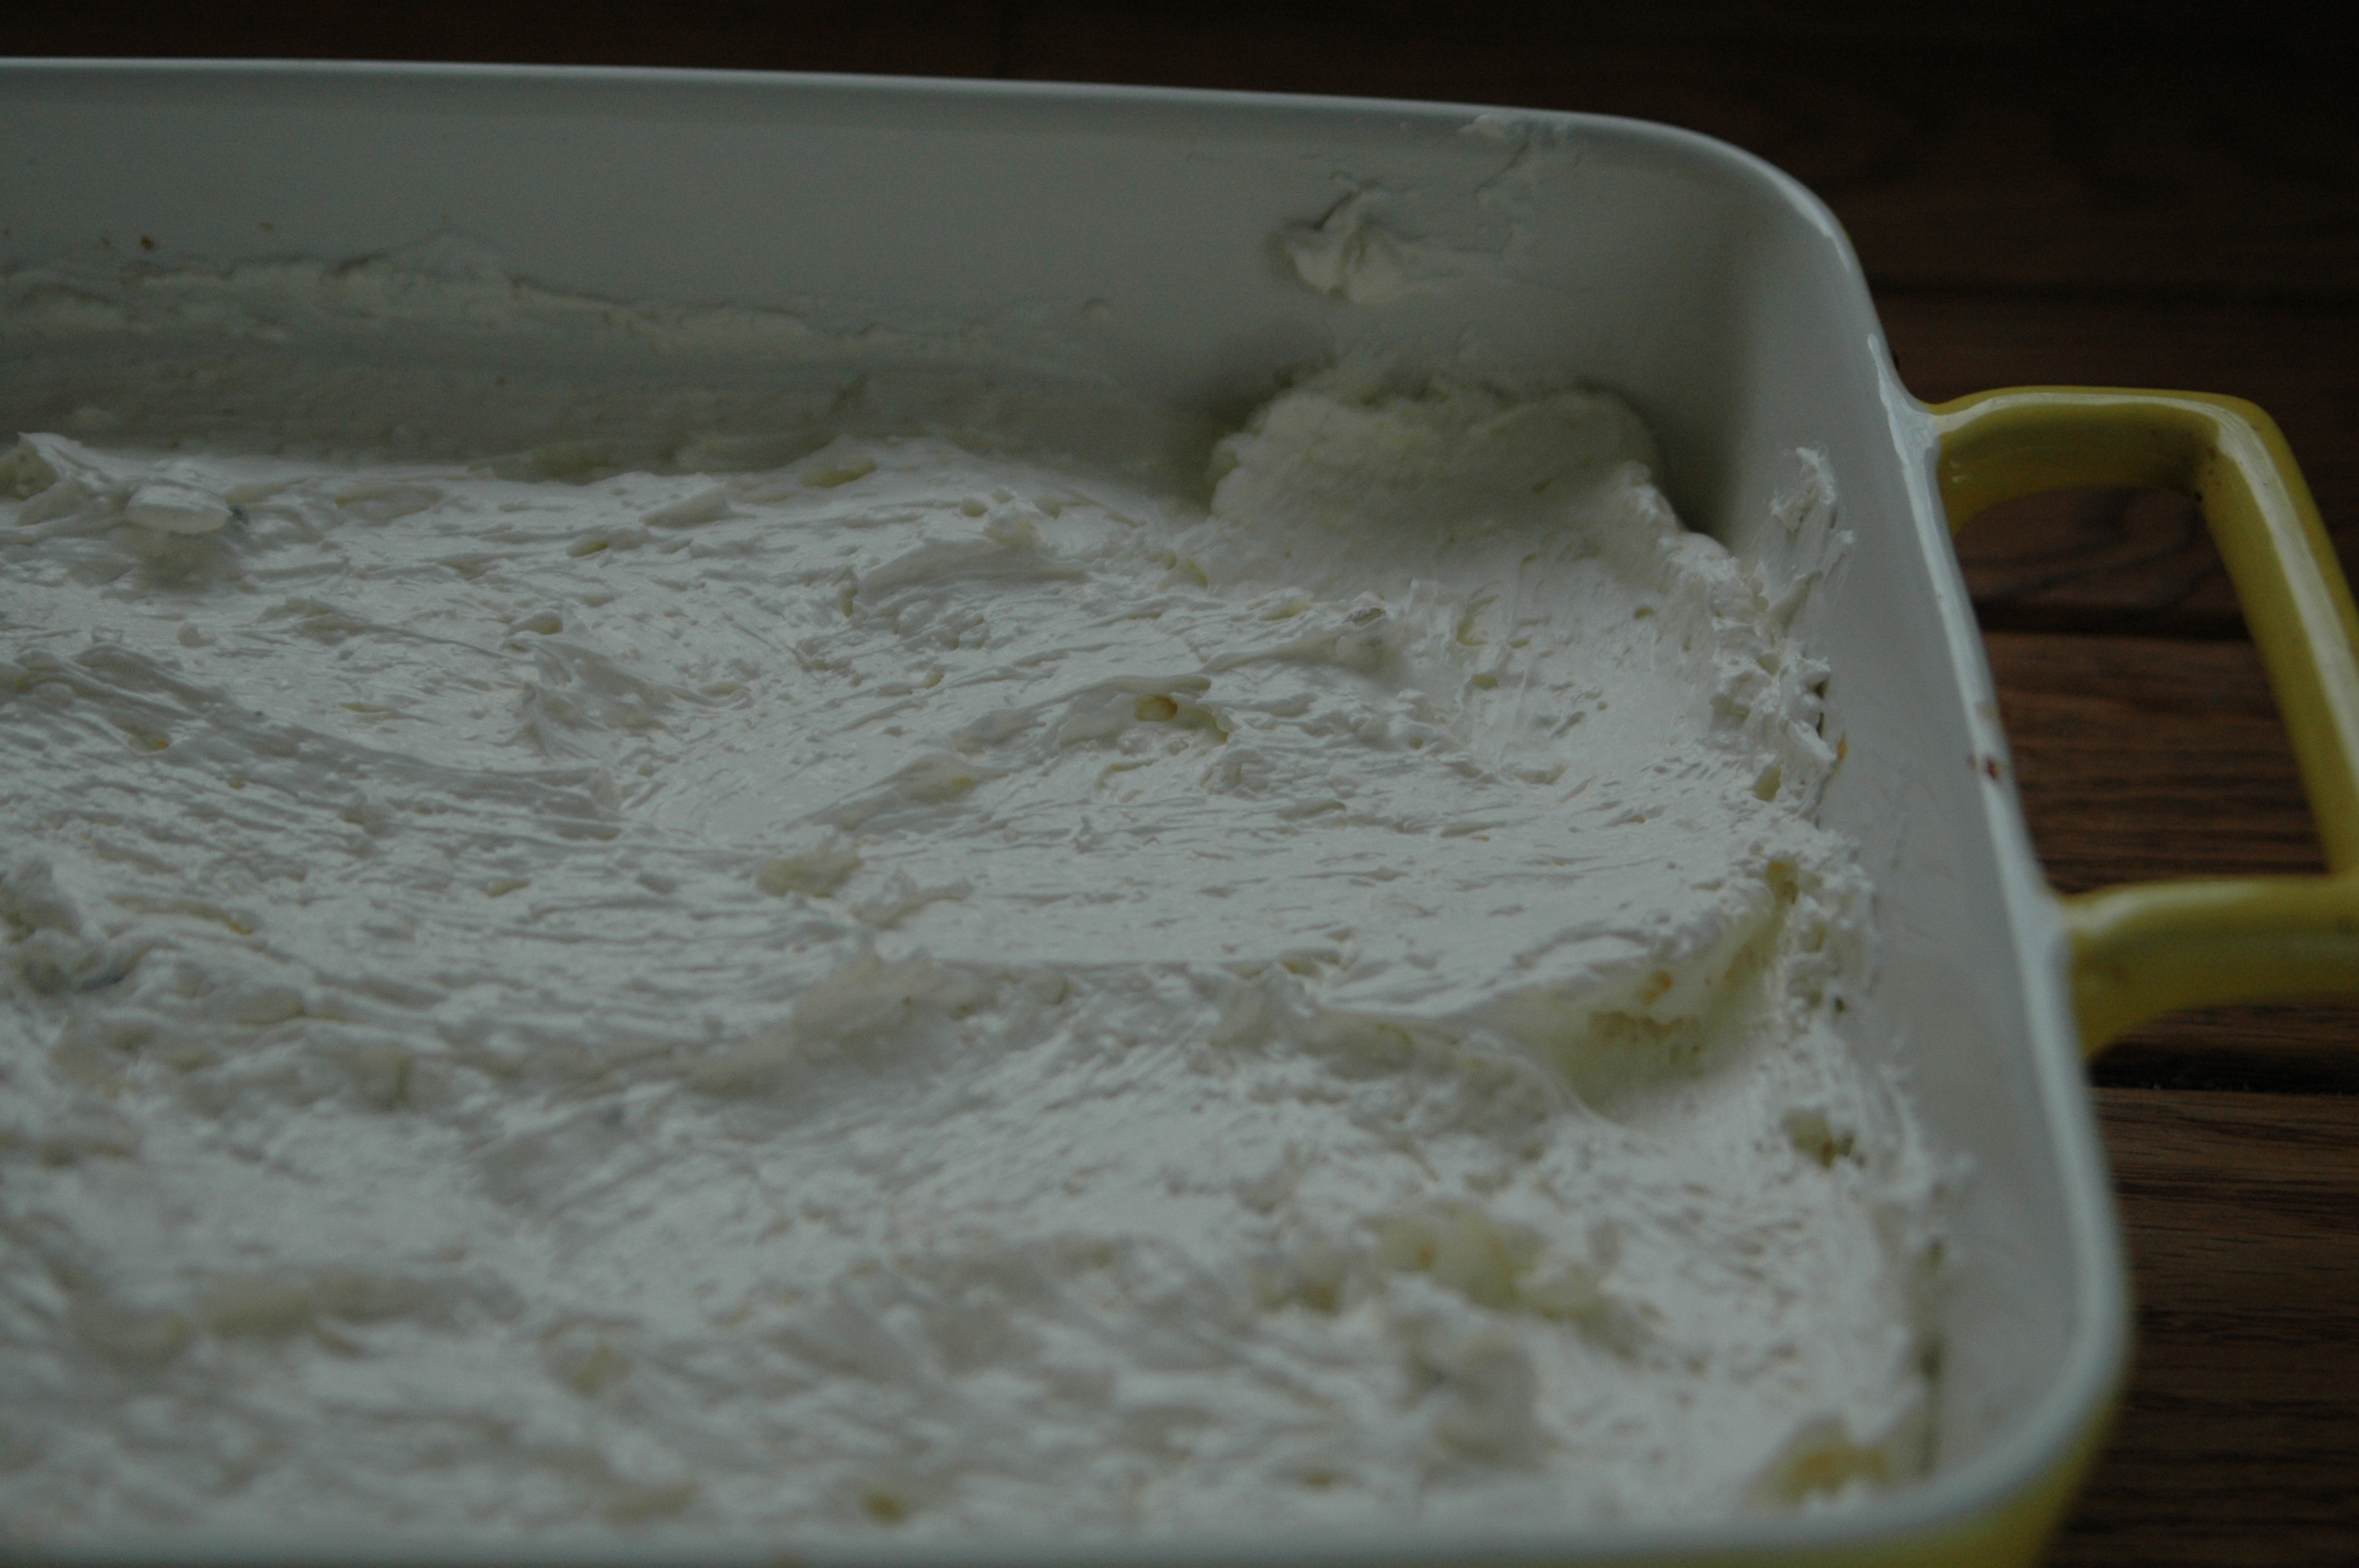
Combine 8 oz cream cheese, 1 cup icing sugar and 1/2 tub of cool whip in a large bowl. Cream together and spread on the cooled bottom layer.
Third layer:
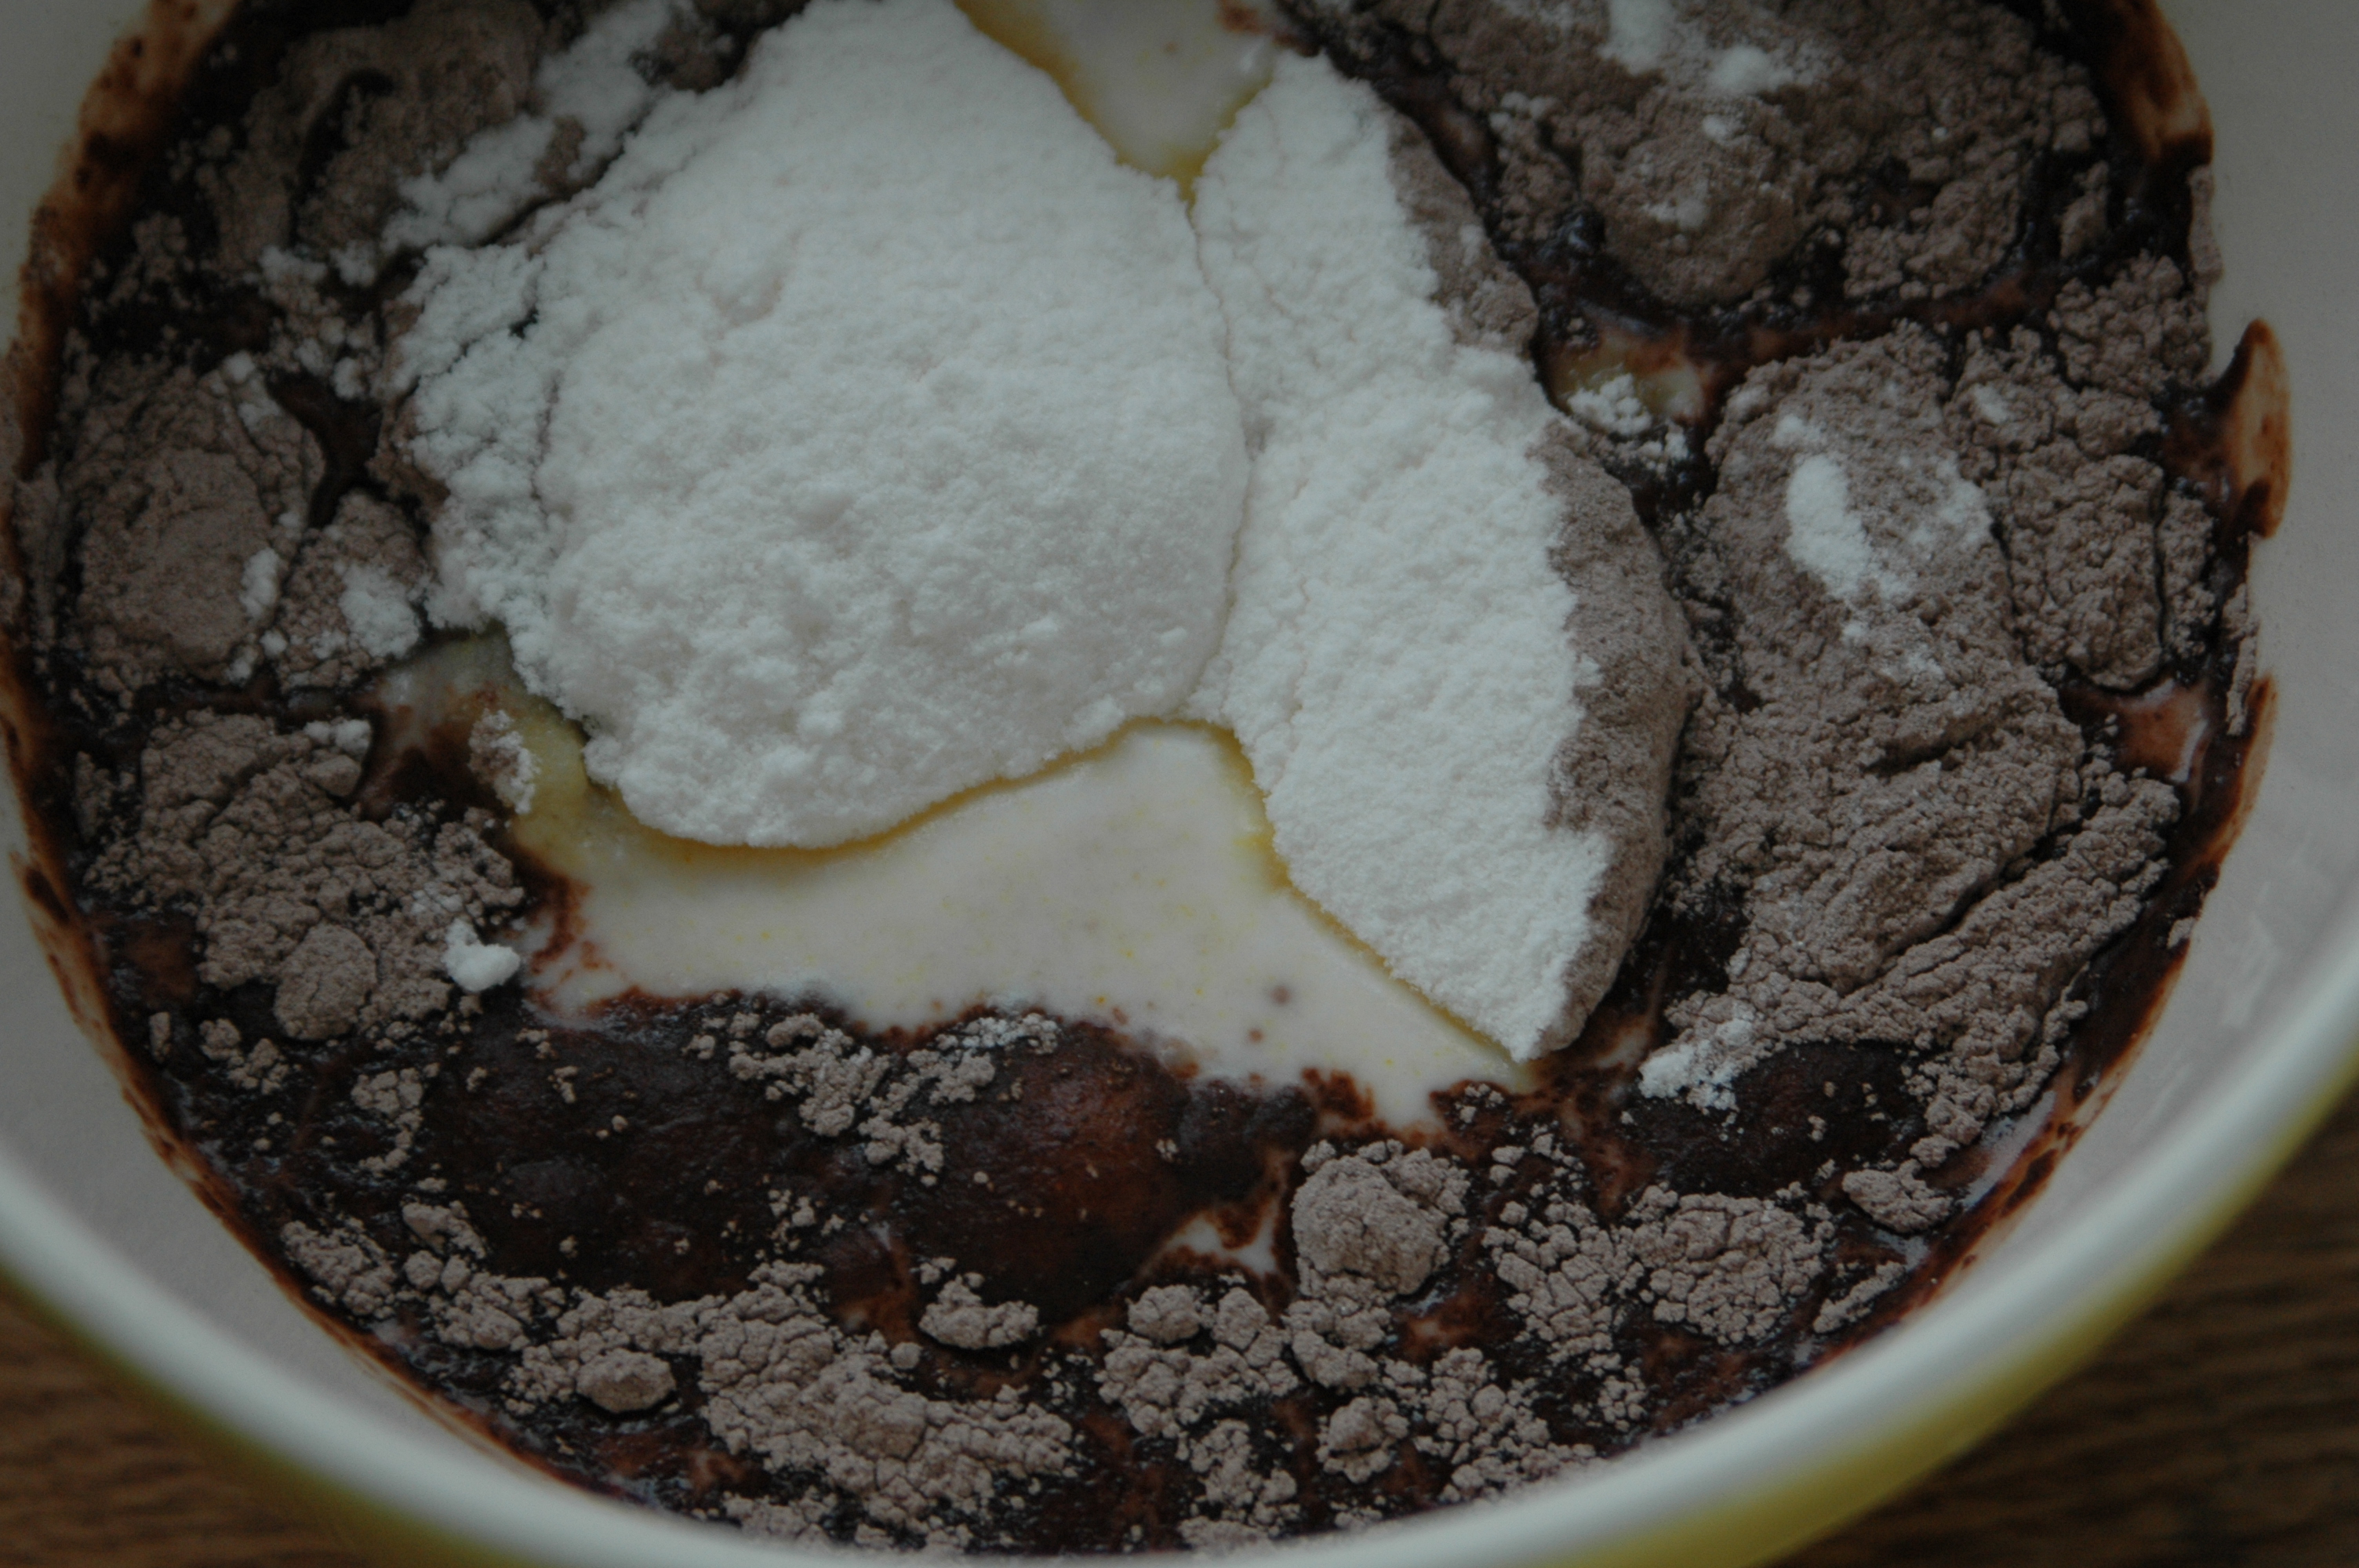
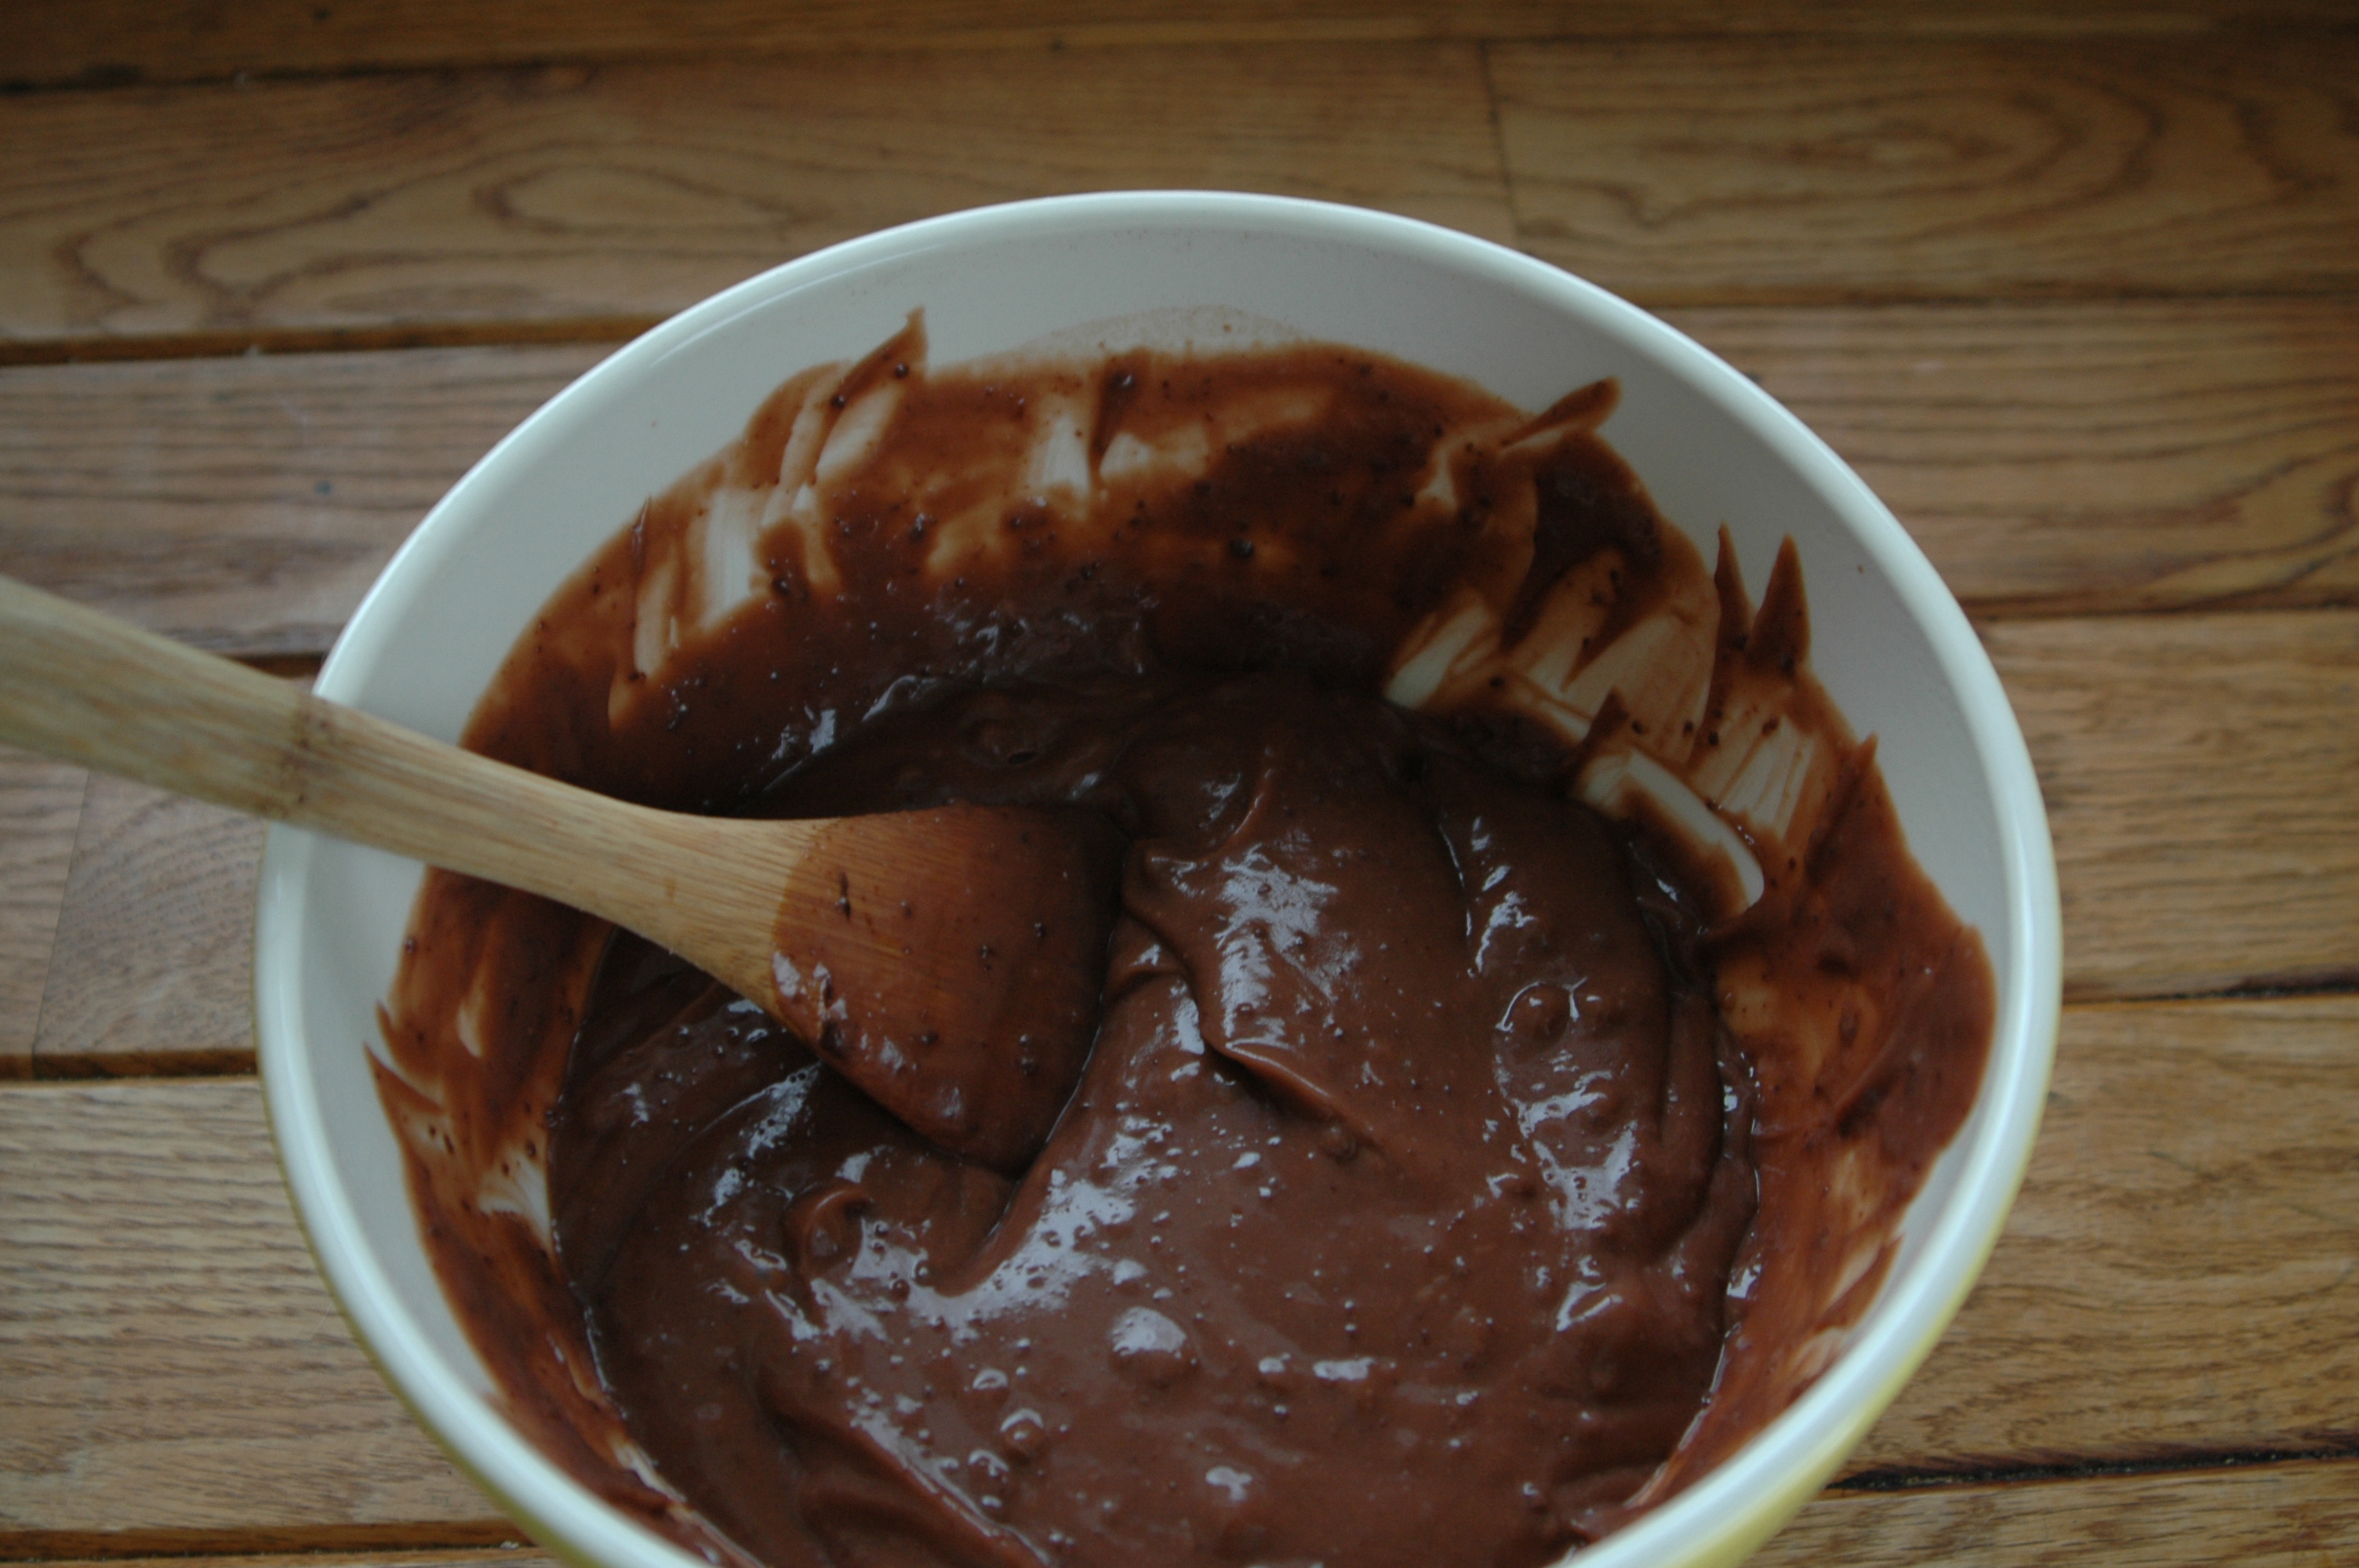
Pour contents of both instant pudding packages in a bowl and combine with 3 cups of milk. Mix and let thicken. Once thick, spread over the second layer
Fourth layer:
Spread remaining cool whip over the top of the pudding. Sprinkle with 1/4 cup toasted chopped pecans.
Place in fridge until it is time to consume 

Like I said - easiest dessert ever ;)

My Copper Jam Pot

This is a story about falling in love. If that sentence made you roll your eyes and almost instantly lose interest, would you stick with me if I told you it was with an inanimate object?

Yep...you guessed it. The love that I speak of is with a copper jam pot. If you want to read a blog post about whether preserving with a copper pot is safe, why copper pots are considered great for jam making, etc, then I suggest that you immediately stop reading this blog and click here. Her post may have been written in 2010, but it is thorough and is certain to answer all of your questions. Be sure to scroll through all of the comments as well as there are some hidden gems throughout.

Now lets get back to the matter at hand. Love. L-O-V-E. The kind of love that makes your throat feel dry, your heart beat faster and all logic to simply slip right out of your brain.

At first, I have to admit that this love was of the shallowest kind. I fell in love based on looks alone. I was immediately pulled in by the beauty of the hammered copper jam pot with it's gleaming brass handles. It's alluring angled sides made this pot one that I could simply sit and stare at for hours. I wanted it simply because it was sexy. You heard me...this is one sexy pot!

Sure, deep down I hoped there were other factors at play when I was entering my Visa # on the online order page and staring at what was really an exhorbinent dollar figure in the total column considering I was just buying a pot for making jam. But were there?

With each number that I entered I would tell myself that there were practical advantages to this purchase. The angled sides of the pot allow for better evaporation and shorter cooking times. That copper is an excellent conductor of heat. It all just sounded like 'yadda, yadda, yadda" in my mind. And I hit ORDER while I still knew instinctively that I had just completed the purchase on looks alone. I was shallow and I could live with that.

I practically bounced right out of my skin on the day it arrived. I couldn't open the box fast enough and when I finally pulled it from it's paper wrapping and held it in my hands I let out a little gasp when I finally saw it in person. Ridiculous really, but true.

Then today I took it with me to the commercial kitchen to make a batch of marmalade. It was the first time I would put it to use. I kept admiring it's brass handles and all of the other physical attributes about it that I loved. But I knew I had fallen into a different kind of love when I actually tasted the finished batch.


Marmalade - Superfine, Fine, Medium or Thick Cut

Superfine peel - best obtained with a zester

When you make your marmalade, do you slice the peel real thin?

Do you zest it very slowly, or cut it while you grin?

Eat that thick cut, thin cut marmalade, but tell me when I ask,

when you make your marmalade, do you cut the peel real fast?

Fine cut peel - best obtained by cutting the peel off with a sharp knife and then chopping it very fine

Medium Cut Peel - best obtained by juicing the orange and then removing all of the membrane from inside the peel, and then cutting into medium size chunks.

Thick cut peel - best obtained by juicing the orange and then removing all of the membrane from inside the peel, and then cutting into thick size chunks.

January 2014: A Canadian Resolution

I love lists. Yes, that may sound strange, but it is true. Nothing pleases me more than a well thought out list, except maybe the joy of crossing things off that list. What a sense of accomplishment that simple act of putting a line through something on your list produces.

So it may now seem strange for a list lover like myself to admit that I have never really been the type to make New Year’s Resolutions. It almost seems like when you make a resolution you are just putting something up on a ‘What I will Fail at This Year’ list. And while that in itself is a list, it isn’t the kind of list I love.

Instead I try to set goals for myself that include a sublist of all of the steps required to help me achieve that goal. These goals don’t get set out at the onset of a New Year, it is an ongoing process; things get added, things get removed.

There are a couple of items on this list that I will share with you. The first is something I knew would be a struggle the moment I decided to hand in my resignation at my full time marketing job back in May of 2013 and go full time on my small preserving business. 

1)   Work/life balance.

While 2013 was a wonderful year filled with many great and wonderful exciting things for Manning Canning, it was definitely a year that fell heavier into the work side of the pendulum. It was to be expected and I weathered the storm, but in 2014 I am going to make a real effort on swinging that back over just a touch.

2)   Carry on family traditions.

Just over a year ago, my nonna passed away. She was 96, she went peacefully in her sleep as she always wanted and she had lived a good life. But after she passed, the hole that she left behind started to feel larger and larger with each passing day. I thought about all that our family had lost with her passing. Not just her presence, but the memories of the past and the skills she brought to the family unit.

I started to want to learn to make all of the wonderful things that she used to bake, I wanted to somehow carry on whatever bits of her knowledge that I could. Last year, I took on her infamous butterhorns and cream puffs and on the list for this year is her Italian Sweet Bread and her gnocchi to start.

My first attempt at the sweet bread produced a heavy, dense bread that was nothing like the light, fluffy bread she would make in her coal/wood burning stove. I could blame my instruments but in actuality I know it is my own personal skills that need tuning. I am not fazed by my failure, quite the opposite. It feels like a challenge and one that I am going to enjoy facing head on. After all, my nona made that bread hundreds of times. I am sure her first batch was not the 'light as air' loaf that I remember from my childhood.

Whatever your approach to your New Year's Resolutions may be, I hope you all succeed at the one's that are the most important to you.

Happy New Year!

This post is part of The Canadian Food Experience, it began June 7 2013. As we share our collective stories through our regional food experiences, we hope to bring global clarity to our Canadian culinary identity.